Command line quickstart
Throughout this document you will find these quickstart sections which contain command line shortcuts for the console workflows and procedures described in the text.
Welcome to the documentation for the Ophicleide Word2vec application. Ophicleide is a cloud native application that provides users with an easy path to train and query Word2vec models from their web browser.
Ophicleide can ingest text corpora from any URL it can reach through HTTP/S protocols. Word2vec models are then trained from these texts, with the end result being an interface to make single word queries against the models to find other words in the corpora with similar vectors.
The Ophicleide application suite is primarily composed of two microservice containers: ophicleide-training and ophicleide-web.
The ophicleide-training microservice is a Python and PySpark application that receives training and query requests through a RESTful interface. It uses the Apache Spark processing framework to perform Word2vec calculations on text corpora supplied by the user. The results of these calculations are stored as models in a MongoDB database.
The ophicleide-web microservice is a Node.js application that communicates with the ophicleide-training REST interface, and provides a graphical interface to users through their web browser using AngularJS and PatternFly. It allows users to create Word2vec training models by supplying URLs containing the source corpora to be processed, and to make single word similarity queries against those models.
The following diagram shows the overall architecture of the Ophicleide suite.

Please note that the number of Spark containers and text data presented here is for demonstration purposes, the actual numbers will differ depending on your usage.
Installing the Ophicleide application suite is a relatively simple process that mainly consists of creating a template in OpenShift and then launching the application. There are a few prerequisites that must be accomplished before Ophicleide can be launched.
In general, these steps can be summarized as:
Install prerequisities
Upload Ophicleide object list template
Launch Ophicleide
Ophicleide requires a few services to accomplish its processing: an Apache Spark cluster, and a MongoDB datastore.
To install an Apache Spark cluster into your OpenShift project, you should use one of the Oshinko related technologies. A quick start guide for getting these up and running can be found on the radanalytics.io Get Started page. You will need to record the Spark master URL from this deployment.
OpenShift includes a MongoDB template in its projects, you can read more
about it in the
OpenShift documentation on MongoDB images.
Be sure to create a database named ophicleide when you deploy the MongoDB
as the ophicleide-training component will use this database for storing its
models and query results. You will need to record the MongoDB connection URL
from this installation.
This template creates several objects in your OpenShift project. These objects will direct the building and deployment of the entire application suite.
For information on how to load this template into your OpenShift project, please see the OpenShift documentation on templates.
Let’s examine the template and explore the various objects that are created.
This template encapsulates a List object which is used to bundle together
the various components necessary for building and deploying Ophicleide. The
first two items are
Image Streams,
which are used to store the results of building the ophicleide-training and
ophicleide-web images for the application.
- kind: ImageStream
  apiVersion: v1
  metadata:
    name: ophicleide-training
  spec: {}

- kind: ImageStream
  apiVersion: v1
  metadata:
    name: ophicleide-web
  spec: {}
After the ImageStream objects, the template defines two build configurations
which inform OpenShift how to perform a
Build
of the related application components.
You will see that these BuildConfig objects each refer to a Git repository
containing the source code for the ophicleide-training and ophicleide-web
components. They also refer to the types of builds that will be performed and
the source Docker images to use as a starting point for those builds.
- kind: BuildConfig
  apiVersion: v1
  metadata:
    name: ophicleide-training
  spec:
    source:
      type: Git
      git:
        uri: https://github.com/ophicleide/ophicleide-training
    strategy:
      type: Docker
    output:
      to:
        kind: ImageStreamTag
        name: ophicleide-training:latest

- kind: BuildConfig
  apiVersion: v1
  metadata:
    name: ophicleide-web
  spec:
    source:
      type: Git
      git:
        uri: https://github.com/ophicleide/ophicleide-web
    strategy:
      type: Source
      sourceStrategy:
        from:
          kind: DockerImage
          name: centos/nodejs-4-centos7:latest
    output:
      to:
        kind: ImageStreamTag
        name: ophicleide-web:latest
The final section of the list defines the Template object that will be used
by OpenShift to display the application in the "Add to Project" section of
the console, or with the command line client. The
OpenShift documentation on Templates
provides an extended discussion of this type of object.
The template for Ophicleide defines two Services, a Route, and a Deployment.
The Service objects provide a useful way to expose the specific ports that
our application components need, and also define static names that can be used
as URIs within the project network.
The Route object associates a hostname with the service for the
ophicleide-web component’s interface.
Finally, the DeploymentConfig instructs OpenShift how the containers of
our application should be deployed into our project. You will see that the
containers of this deployment will be based on the ImageStreams created
earlier, and that each container should be redeployed if either of those
images changes. You can also see how each container will need a few
environment variables and a port defined during their creation. These details
can be explored more fully by examining the source code for the Ophicleide
application components.
Finally, the Template contains a parameters section. This section instructs
OpenShift about variables that we may want to substitute in the final version
of the object. In the case of Ophicleide, there are 2 required and one
optional parameter. As noted earlier, the Spark master URL and MongoDB
connection string are required for Ophicleide to run, the optional
WEB_ROUTE_HOSTNAME is used to define a custom route hostname for the
ophicleide-web component.
- kind: Template
  apiVersion: v1
  template: ophicleide
  metadata:
    name: ophicleide
  objects:

  - kind: Service
    apiVersion: v1
    metadata:
      name: ophicleide-web
      labels:
        app: ophicleide
    spec:
      ports:
        - protocol: TCP
          port: 8080
          targetPort: 8081
      selector:
        name: ophicleide

  - kind: Service
    apiVersion: v1
    metadata:
      name: ophicleide-headless
      labels:
        app: ophicleide
    spec:
      clusterIP: None
      ports:
      - name: driver-rpc-port
        port: 7078
        protocol: TCP
        targetPort: 7078
      - name: blockmanager
        port: 7079
        protocol: TCP
        targetPort: 7079
      selector:
        name: ophicleide

  - kind: Route
    apiVersion: v1
    metadata:
      name: ophicleide-web
      labels:
        app: ophicleide
    spec:
      host: ${WEB_ROUTE_HOSTNAME}
      to:
        kind: Service
        name: ophicleide-web

  - kind: DeploymentConfig
    apiVersion: v1
    metadata:
      name: ophicleide
      labels:
        app: ophicleide
    spec:
      strategy:
        type: Rolling
      triggers:
        - type: ConfigChange
        - type: ImageChange
          imageChangeParams:
            automatic: true
            containerNames:
              - ophicleide-web
            from:
              kind: ImageStreamTag
              name: ophicleide-web:latest
        - type: ImageChange
          imageChangeParams:
            automatic: true
            containerNames:
              - ophicleide-training
            from:
              kind: ImageStreamTag
              name: ophicleide-training:latest
      replicas: 1
      selector:
        name: ophicleide
      template:
        metadata:
          labels:
            app: ophicleide
        spec:
          containers:
            - name: ophicleide-web
              image: ophicleide-web:latest
              env:
                - name: OPHICLEIDE_TRAINING_ADDR
                  value: "127.0.0.1"
                - name: OPHICLEIDE_TRAINING_PORT
                  value: "8080"
                - name: OPHICLEIDE_WEB_PORT
                  value: "8081"
              ports:
                - containerPort: 8081
                  protocol: TCP
            - name: ophicleide-training
              image: ophicleide-training:latest
              env:
                - name: OPH_MONGO_URL
                  value: ${MONGO}
                - name: OPH_SPARK_MASTER_URL
                  value: ${SPARK}
                - name: DRIVER_HOST
                  value: ophicleide-headless
              ports:
                - containerPort: 8080
                  protocol: TCP
                - containerPort: 7078
                  protocol: TCP
                - containerPort: 7079
                  protocol: TCP

  parameters:
    - name: SPARK
      description: connection string for the spark master
      required: true
    - name: MONGO
      description: connection string for mongo
      required: true
    - name: WEB_ROUTE_HOSTNAME
      description: The hostname used to create the external route for the ophicleide-web component
With the Ophicleide objects loaded into your project, you are now ready to begin the process of building and launching the application suite. Before the Ophicleide components can be started though, their images must be built and tagged as image streams in the project.
Previously, the ImageStream objects were created to provide a location within
the project to store the built applications. Now you must build the
ophicleide-training and ophicleide-web images. This can be done by navigating
to the build section in the web console or by using the command line. For a
thorough discussion of starting a build, please see the
OpenShift documentation on builds.
Note to complete the builds within your project, you will need to have
the system:image-pusher role on your account.
The build time for these images should be under 5 minutes, assuming there are no connection issues. Information about the build process can be seen by accessing the logs of either build.
With both images successfully built, you are now ready to launch the entire application suite. As mentioned previously, you will need two pieces of information to complete the launch: the Spark master URL, and the MongoDB connection string.
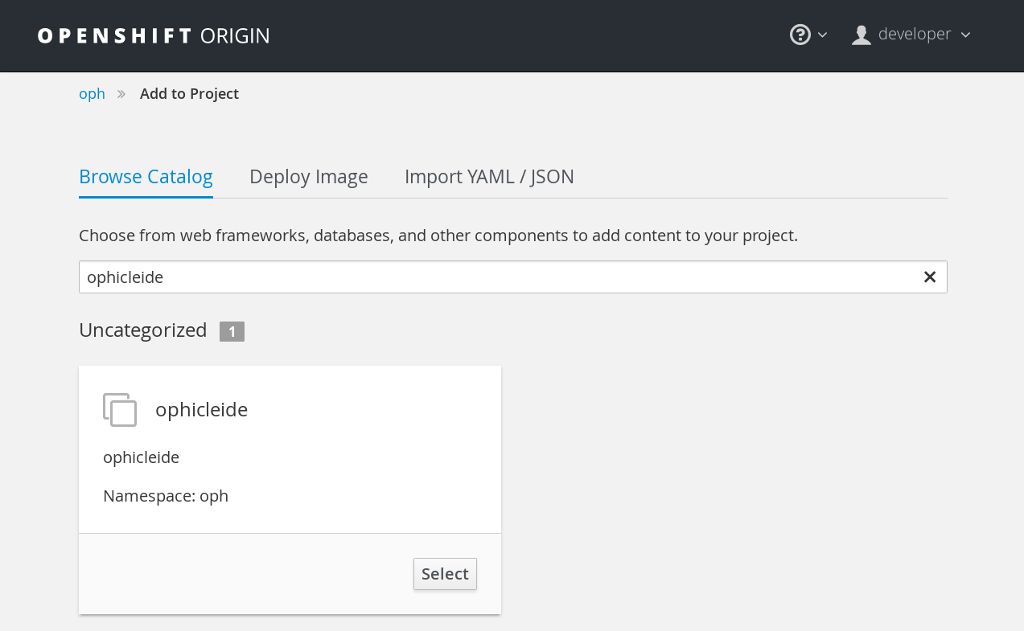
Ophicleide can be launched by navigating to the "Add to Project" section of
your project, and then searching for ophicleide in the provided form. You
should see a screen similar to this:
Selecting the Ophicleide template will bring you to the following screen which will allow the input of our connection strings and the actual launch:
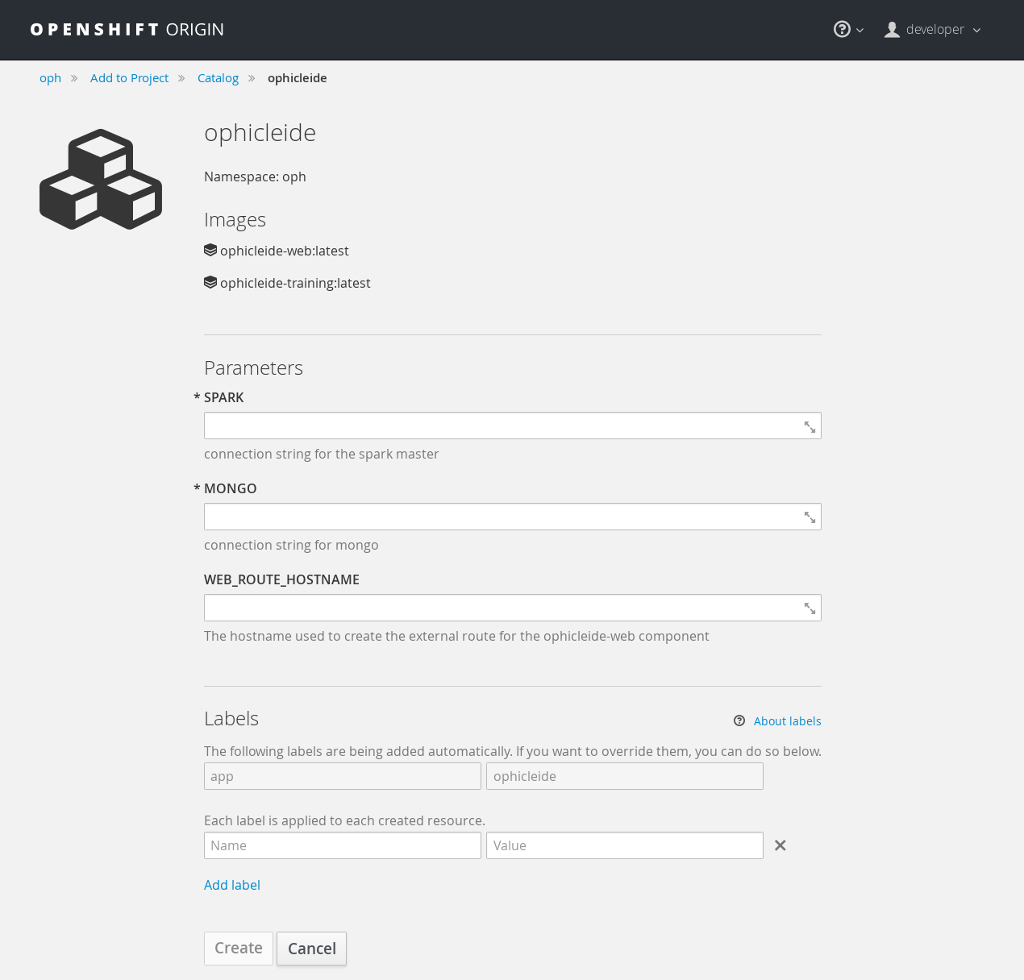
You should now fill in the forms for the Spark master URL and the MongoDB connection string, you may optionally add a route hostname. By default, OpenShift will use a preconfigured value for the hostname of the route. It will be determined by using the application name, project name, and a value configured by the site administrator for the domain name of the OpenShift installation.
With everything filled in, you may now click the "Create" button and your application pods should start launching.
For extended discussions on creating objects through templates, please see the following OpenShift documents: Creating from Templates Using the Web Console and Creating from Templates Using the CLI.
Now that Ophicleide is running in your project it is time to begin training models and executing queries against those models.
To begin with, you will need to navigate to the main web page for Ophicleide. On the "Overview" page of you project, you will see a header for the Ophicleide pod that should look similar to the following image:

(Note, your route hostname should be different)
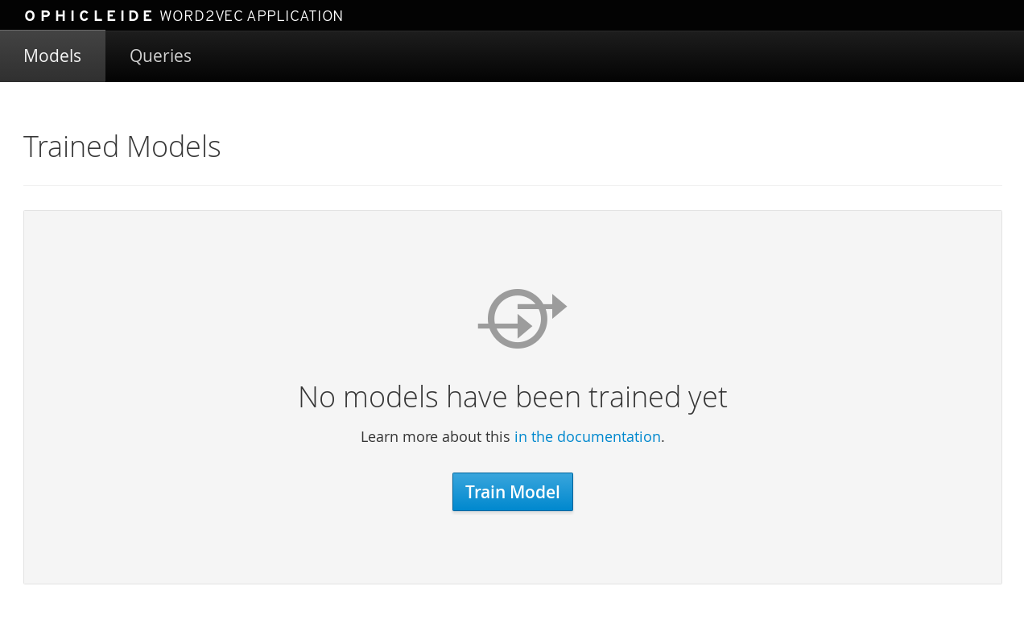
Clicking on that link will take you to the landing page for the ophicleide-web component. This page displays the training models that are available to run queries against. As no models have been trained yet, it should be empty and look like this:
To start training a model, click on the "Train Model" button. This will bring up a dialog where you will enter the name of the model and the URLs containing the source text corpora. Here is an example with the modal dialog filled out:
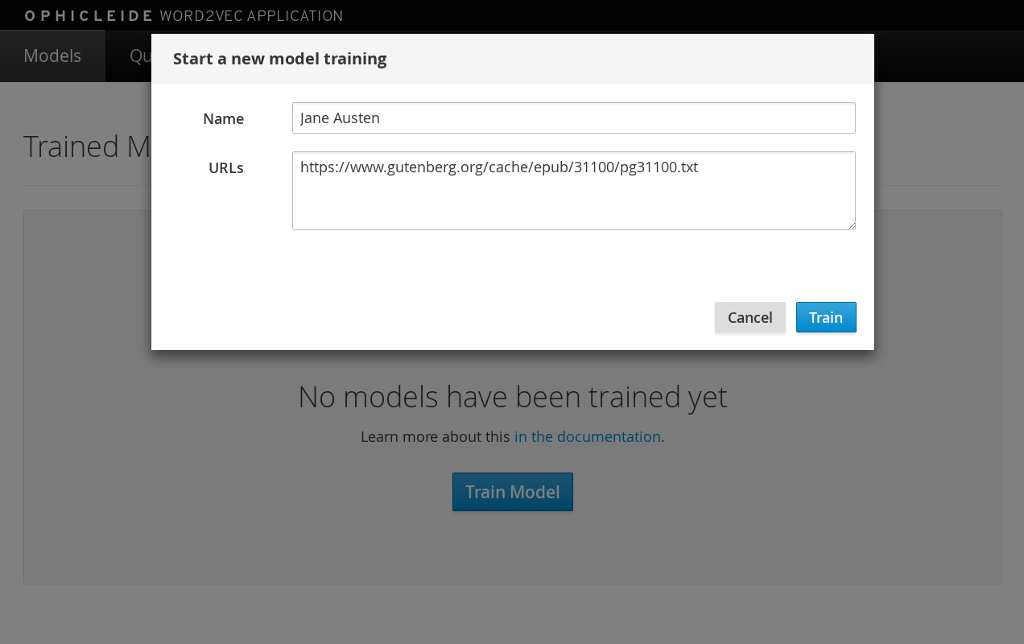
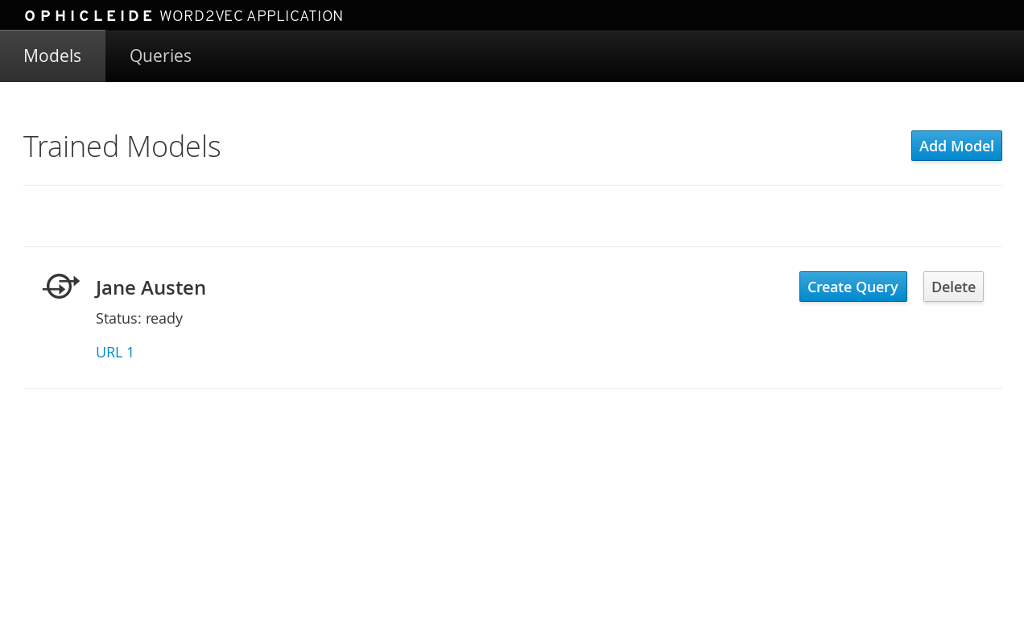
Click on the "Train" button in the dialog to begin the process of training a Word2vec model against the source text corpora. After starting the training your models page will change to look like the following image, with the exception that your status will be "training". When the model training is complete, the status will change to "ready".
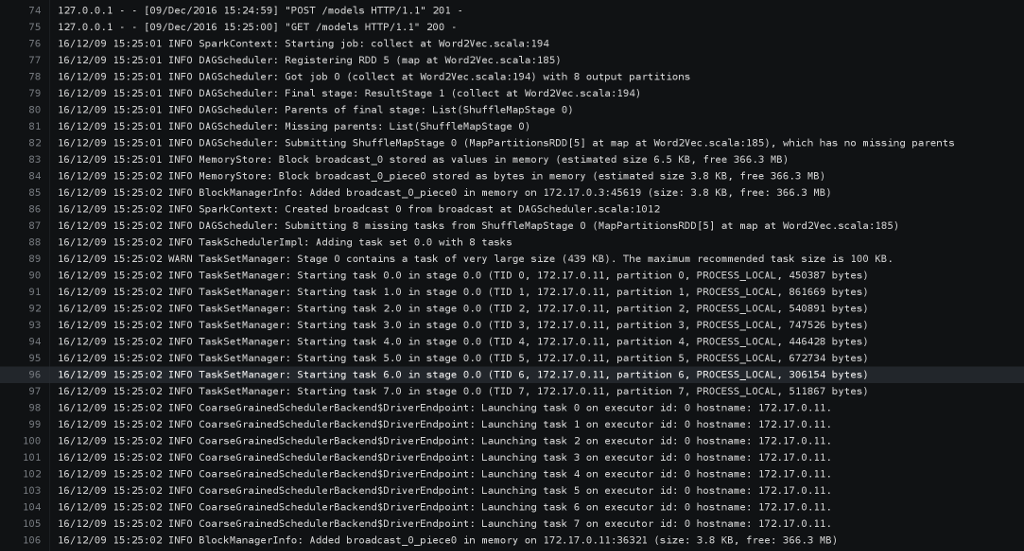
If you would like to verify that the ophicleide-training component is running the Word2vec processing, you can use the OpenShift console to navigate to the Pod view associated with Ophicleide and inspect the logs for the ophicleide-training container. You should see something similar to the following in the output:
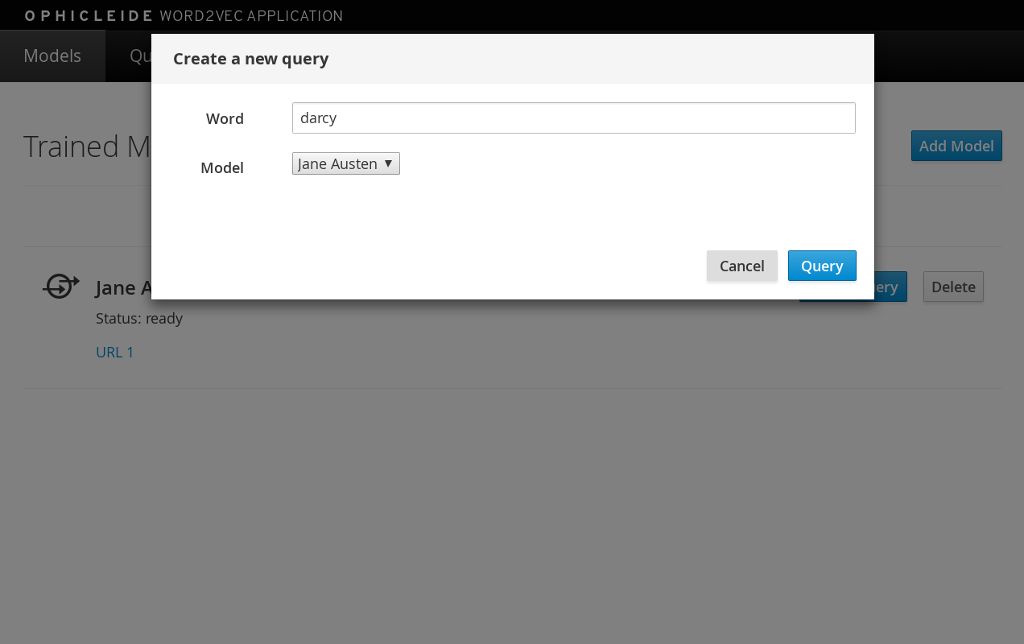
When the model status is "ready", you can click on the "Create Query" button to initiate a word query against that model. Enter a word that you would like to find synonyms for within the corpus, and then click the "Query" button.
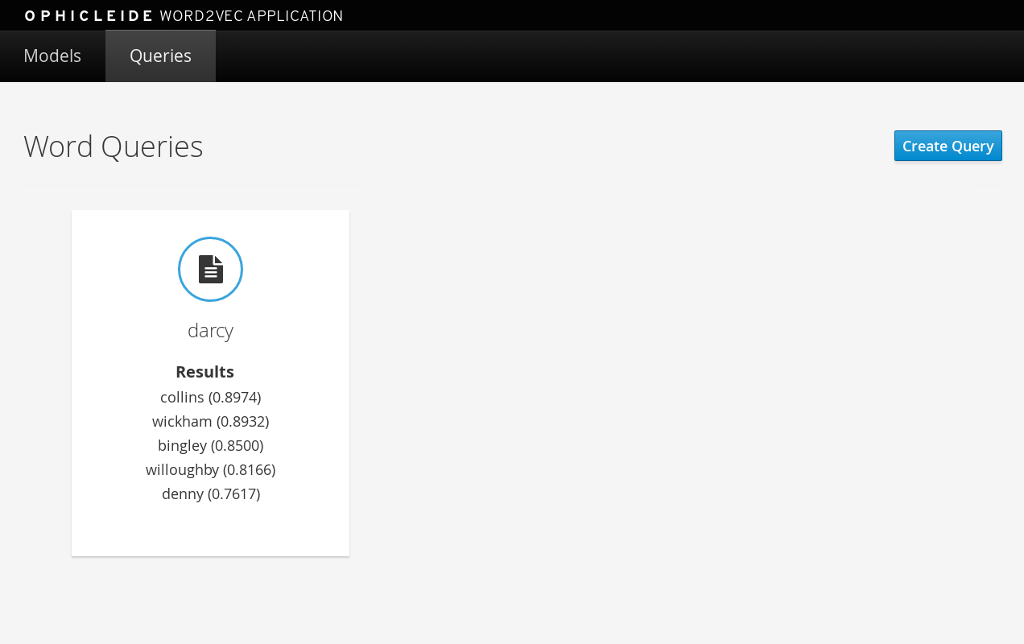
After clicking the "Query" button, the page view will change and you will now be looking at the queries page. This page shows all the word queries that have been run and the top 5 results in each query. You will notice that each result in the query contains the similar word as well as the vector associated with that word.
If you would like to start another query, you can now use the "Create Query" button on this page. As previously, you will enter a word to search for similarities, and since we are now searching from the queries page you will need to select the model to query against using the model select drop-down.
Although Ophicleide is functional and performs the tasks it was designed for, there is always room for improvement and expansion. The following are a few ideas for how Ophicleide could be expanded. These are suggested as possible exercises for the reader and as a starting point to discuss how this type of application can evolve.
Use Spark to process the queries. Currently, the vectors associated with each processed word are stored in a dictionary that the Ophicleide training component uses to return query results. There are facilities in the Word2vec package to use a Spark context for processing these type of searches. Adding this functionality would allow for the lookup workload to be taken off the training component, and provide a platform for deeper introspection of query results.
Separate the query engine into a service. A prominent consideration when designing cloud native applications is scale. How will an application grow to accommodate larger user bases. In the case of Ophicleide, separating out the query engine into a service of its own would give a graceful path to growth. By creating a new service specifically for queries it will become easier to add horizontal scalability by identifying the portions of the application which are being used the most and then replicating them.