oc new-project winemap
Geographic data analytics with PostgreSQL and Apache Spark
Introduction
Welcome to the wine map application. This documentation is intended to display how to use a source-to-image workflow to create a Python application, which connects to a PostgreSQL database. The application uses wine review data to display a heat map of different wines. The data is ingested by a PostgreSQL database and then loaded into an Apache Spark cluster which calculates the ratings. The map is then displayed using a Python Flask server.
Architecture
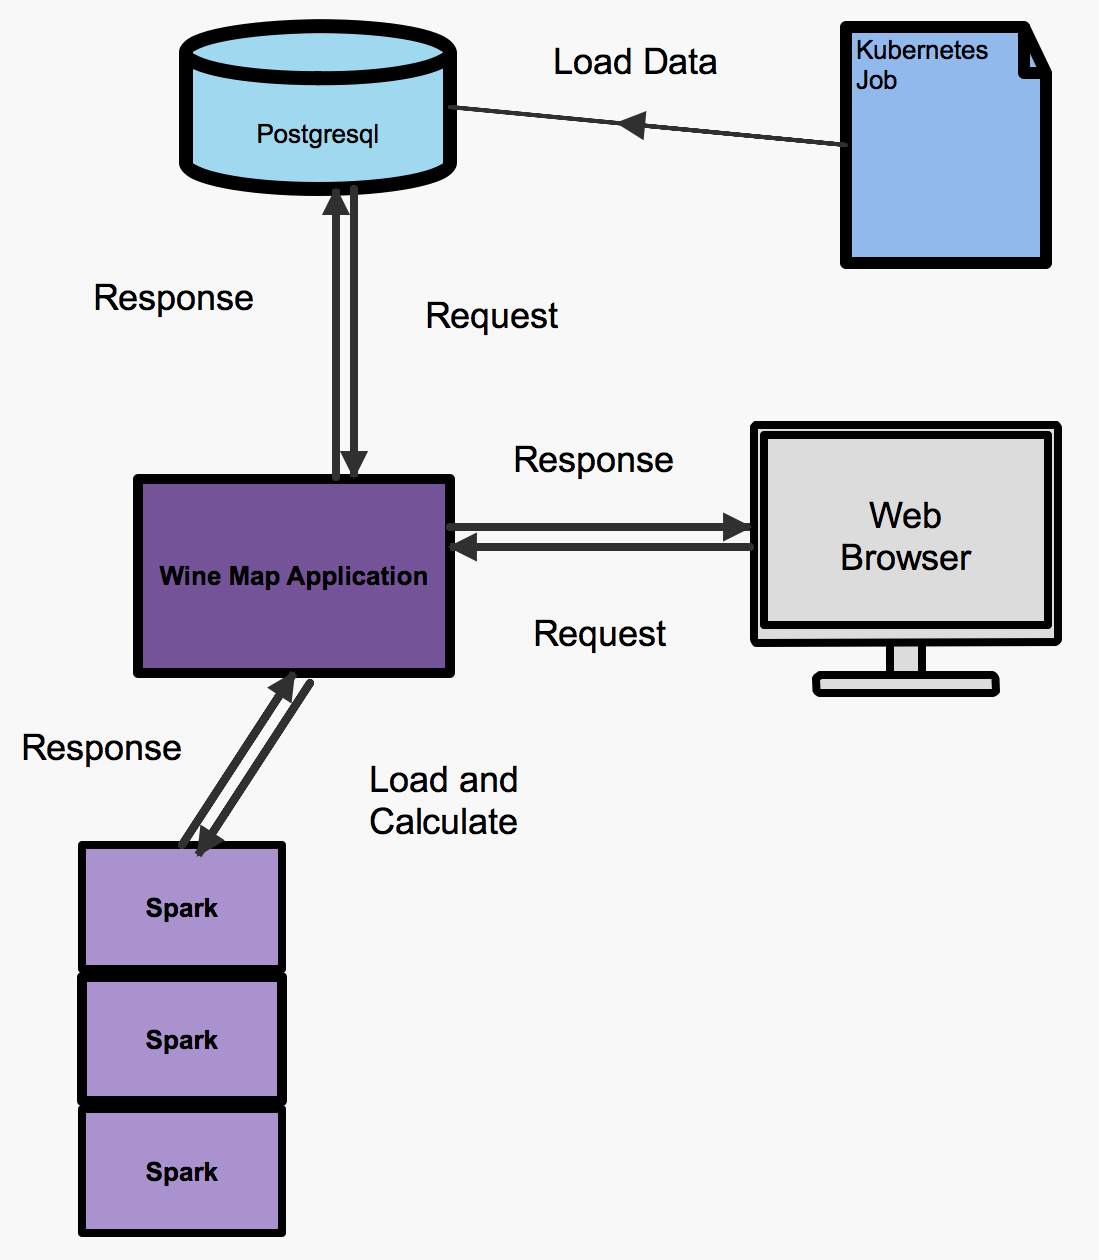
The wine map application is made of three microservices, a PostgreSQL database, a data loader (Kubernetes job) and a Flask application server (wine map application), the architecture is shown in the following diagram. The PostgreSQL database is held within an OpenShift container and can be deployed with one simple command, which will be shown later. The data loader is a Kubernetes job and runs once if no failures occur, if a failure occurs the job will be ran again until it completes. The job executes a Python script which loads the wine data into the database. Once the data is loaded a container is deployed using the source-to-image workflow, which accesses the data and displays it on a webpage as a heat map. The data taken from the PostgreSQL database is processed using a Spark cluster. The Spark cluster is created and deployed automatically by tooling included in the image from the oshinko project. The Spark cluster takes the wine review data and calculates the average number of points each country has scored (this is calculated using different wines from the same country).
Installation
First you need access to an OpenShift cluster and the oshinko resources have a look at the getting started page.
The next step is to create a project for the wine map application to reside in. Type in the following command to create your project:
After you have created an OpenShift cluster and a project to deploy containers into the next step is to deploy a PostgreSQL database. This can be done easily using the PostgreSQL template provided by OpenShift with parameters stating the username, password and database name. For this example just copy the command below:
oc new-app --template=postgresql-ephemeral \
  -p POSTGRESQL_USER=username \
  -p POSTGRESQL_PASSWORD=password \
  -p POSTGRESQL_DATABASE=wineDb
The next step is to load the data into the database. We will create a template for the Kubernetes job. The template references an image which executes a Python script to load the data. The command you need to use is:
oc create -f https://raw.githubusercontent.com/radanalyticsio/winemap-data-loader/master/wine-data-loader.yaml
We then create the job to load the data with the following command:
oc new-app --template=wine-data-loader
The next half of the instructions describes how to create the Flask server and Spark cluster for processing and displaying the map. First of all you must create the oshinko resources in your OpenShift cluster this can be found in the getting started section (you may have already followed these steps).
Then you create the wine map application with the command below. The command below uses a special source-to-image builder to set up the pod environment so that you can execute Python scripts and use Spark. The PostgreSQL driver and details are passed through as parameters and environment variables respectively.
oc new-app --template=oshinko-python-spark-build-dc \
  -p APPLICATION_NAME=winemap \
  -p GIT_URI=https://github.com/radanalyticsio/winemap.git \
  -p SPARK_OPTIONS='--packages org.postgresql:postgresql:42.1.4' \
  -e SERVER=postgresql \
  -e DBNAME=wineDb \
  -e PASSWORD=password \
  -e USER=username
You must then expose the application so that you can view the results, this can be done by clicking create route in the console and following the url or by using the below command:
oc expose svc/winemap
You can use the browser to follow the route through the console or by using the following command:
$ oc get route
NAME                      HOST/PORT                                      PATH      SERVICES            PORT       TERMINATION   WILDCARD
winemap                   winemap-winemap-namespace.127.0.0.1.nip.io               winemap           8080-tcp                     None
You have now created and exposed the microservices you need for the wine map application.
Usage
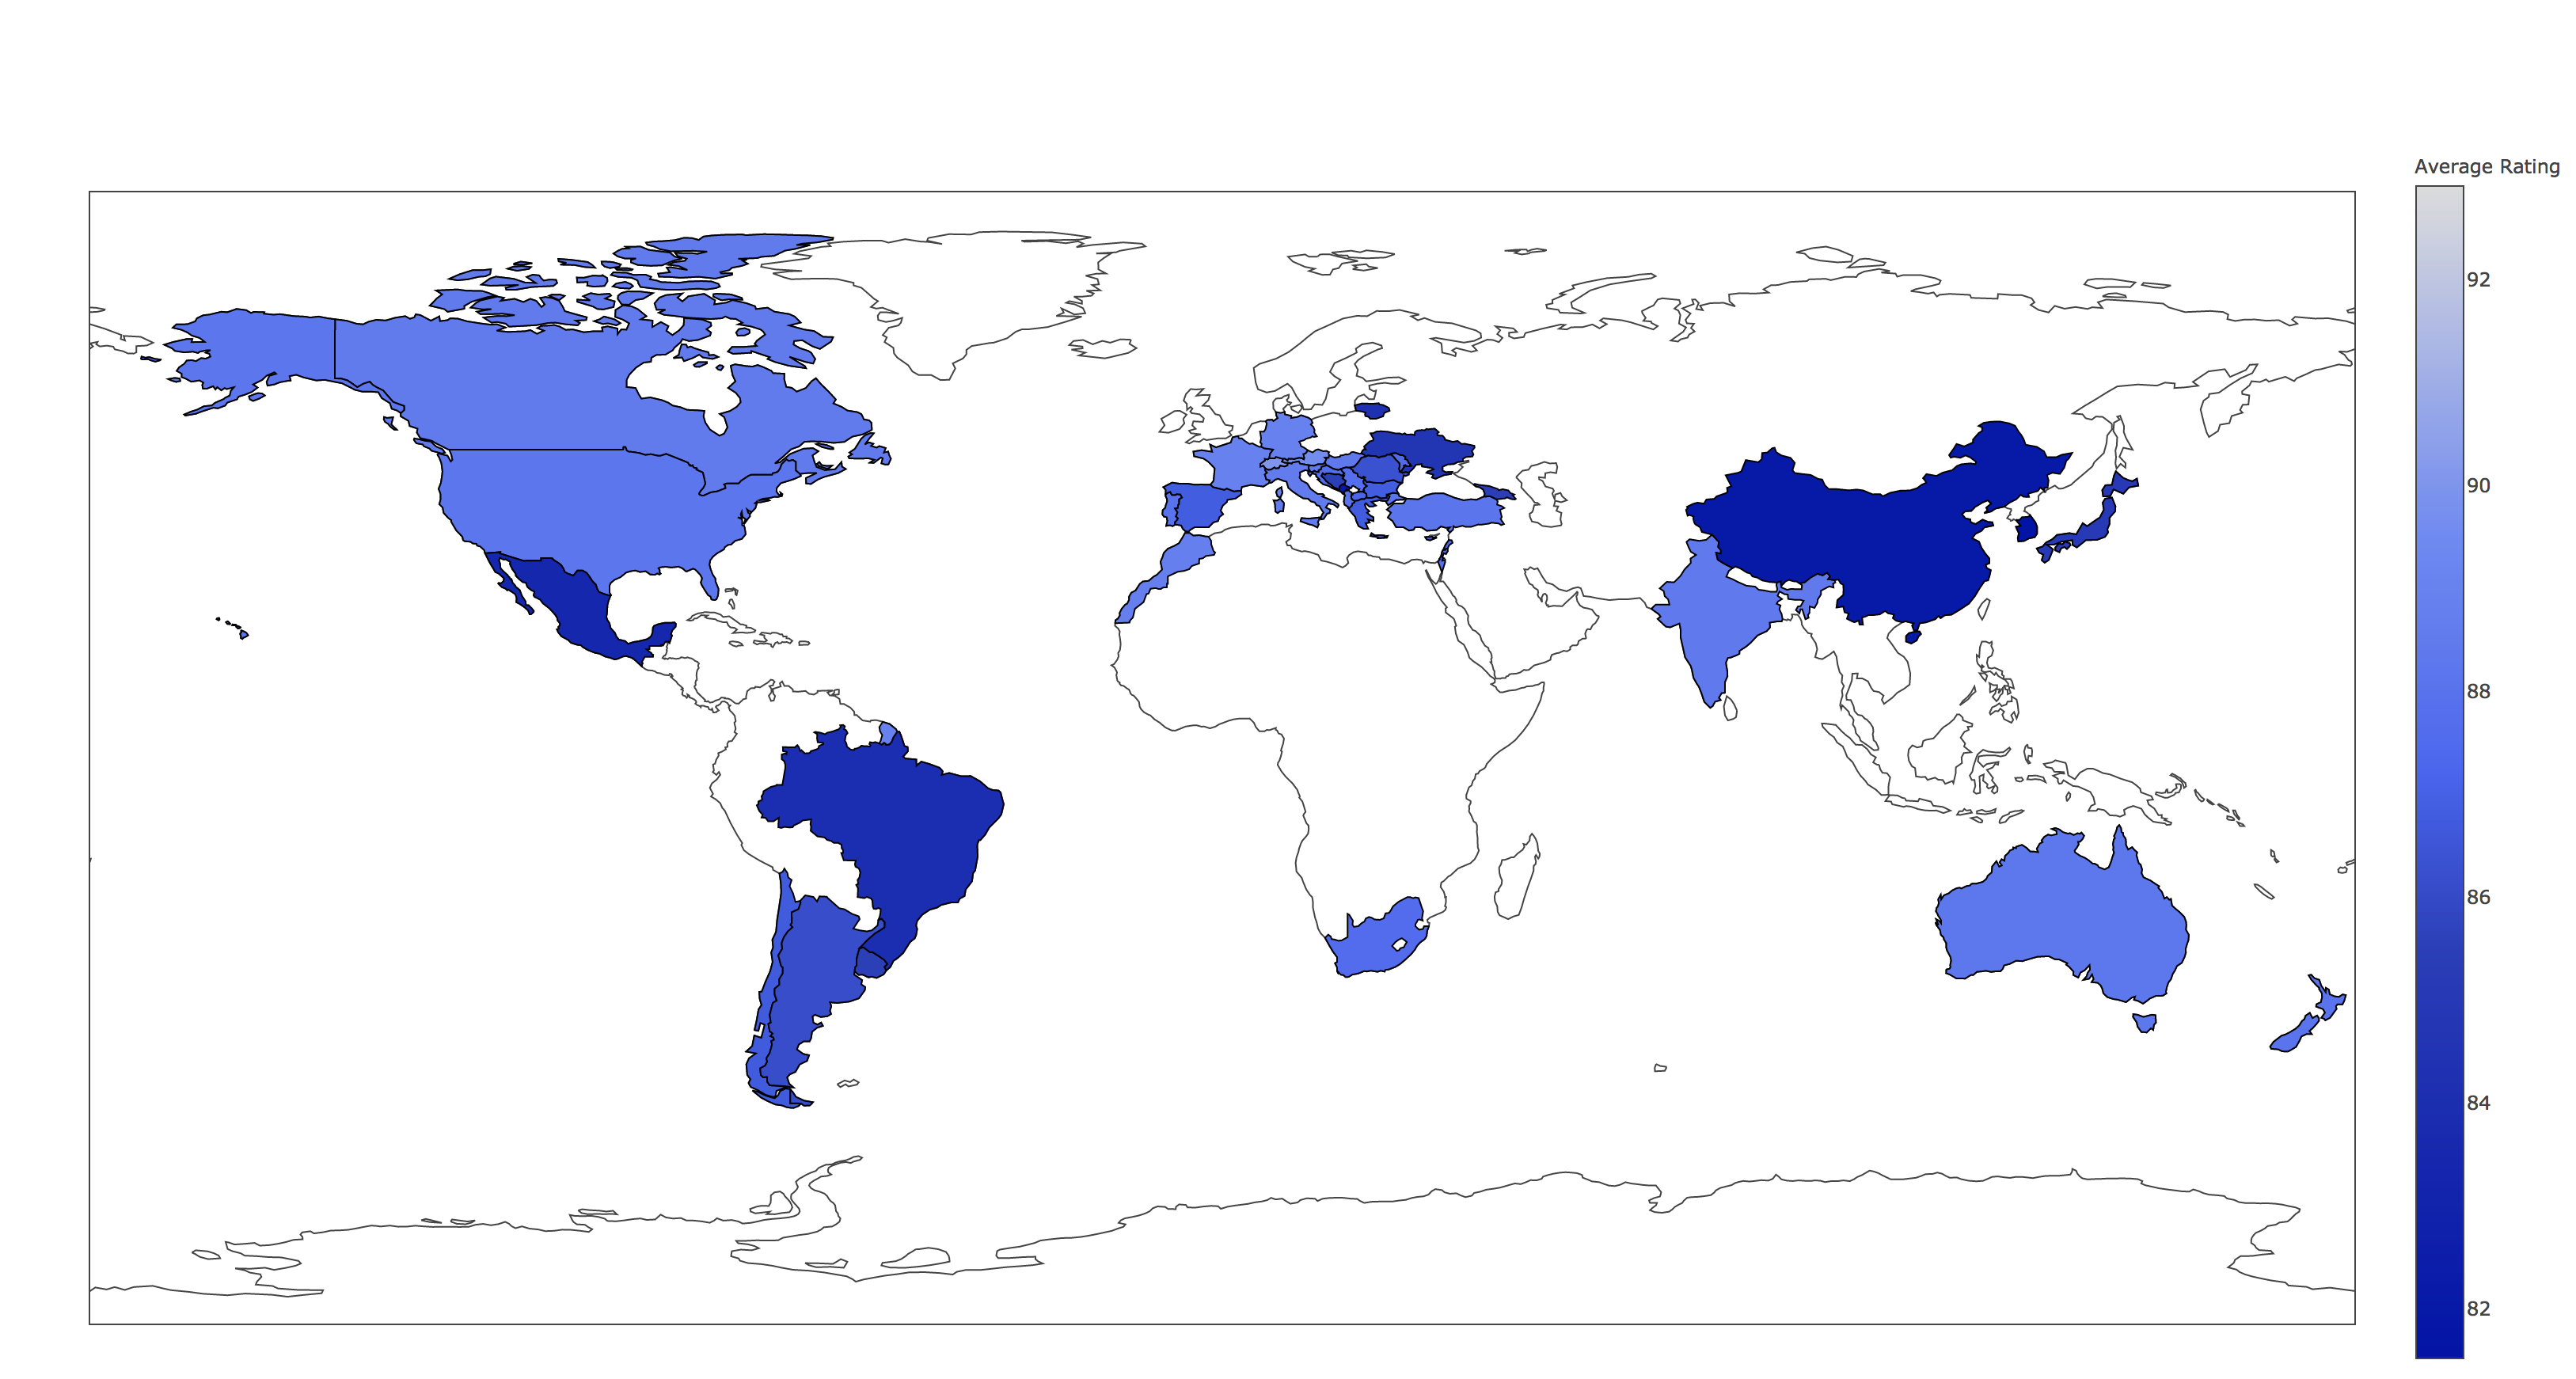
Now that the application is up and running you can go to the OpenShift console and log in, from there you will be able to access the application from the route that you created. After clicking through to the link you should see a heat map like the one shown below:
Expansion
This is a very simplistic calculation for the heat map. To expand the work you could think of different ways to manipulate the data within the spark cluster by modifying the “app.py” script. This could be by changing the way in which you display the data by using, for example, a chart instead.
Videos
Demonstration of how to set up and use the application.